Introduction
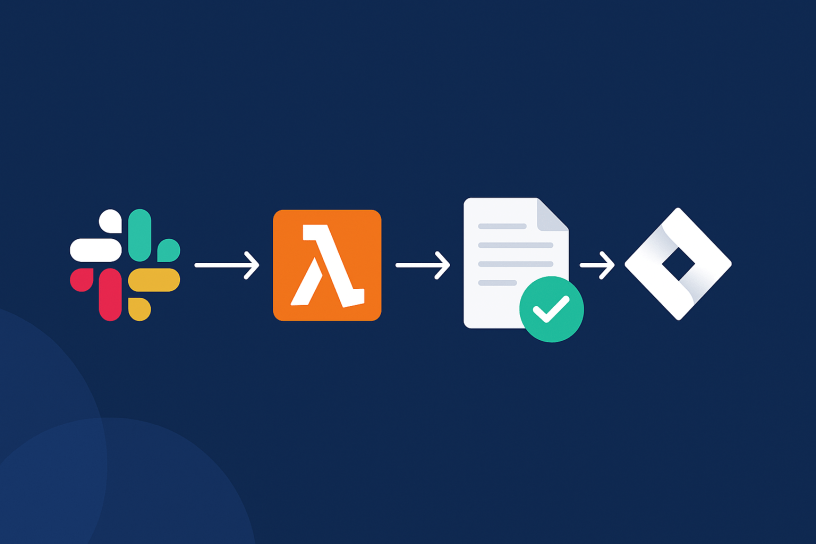
In this blog post, I’ll explore how to create a powerful automation workflow that integrates Slack, Jira, and AWS Lambda. By combining these tools, you can automate approval requests for Jira issues directly from your Slack workspace.
This solution, although specific to each client, addresses a pain point that some users would like to have, which I found here in this ticket: https://jira.atlassian.com/browse/API-212
- Introduction
- Creating a Slack App
- Building the AWS Lambda Function
- Create the Automation Rule in Jira
- Exploring the Code
- Let´s Test!
Creating a Slack App
Creating a Slack app for your workspace is a fundamental step in enabling seamless interactions between Slack, Jira, and AWS Lambda. Here’s how you can set up your Slack app:
- Go to the Slack API website (https://api.slack.com/apps) and click on “Create New App.”
- Give your app a name and select the Slack workspace where you want to install it.
- Navigate to “OAuth & Permissions” in the left-hand menu, and add the following scopes to your app:
chat:writechat:write.publicchannels:join

- Click the “Install to Workspace” button to install your app to the selected workspace. This will give you the
SLACK_TOKENneed as one of the environment variables later.
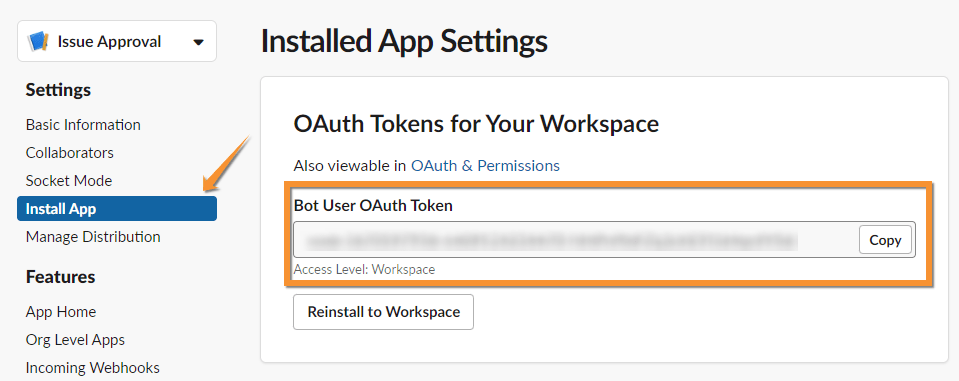
By completing these steps, you’ll have created a Slack app and obtained your Slack API token, setting the stage for interactions.
Building the AWS Lambda Function
- Go to the AWS Lambda Console (https://console.aws.amazon.com/lambda).
- Click “Create function.”
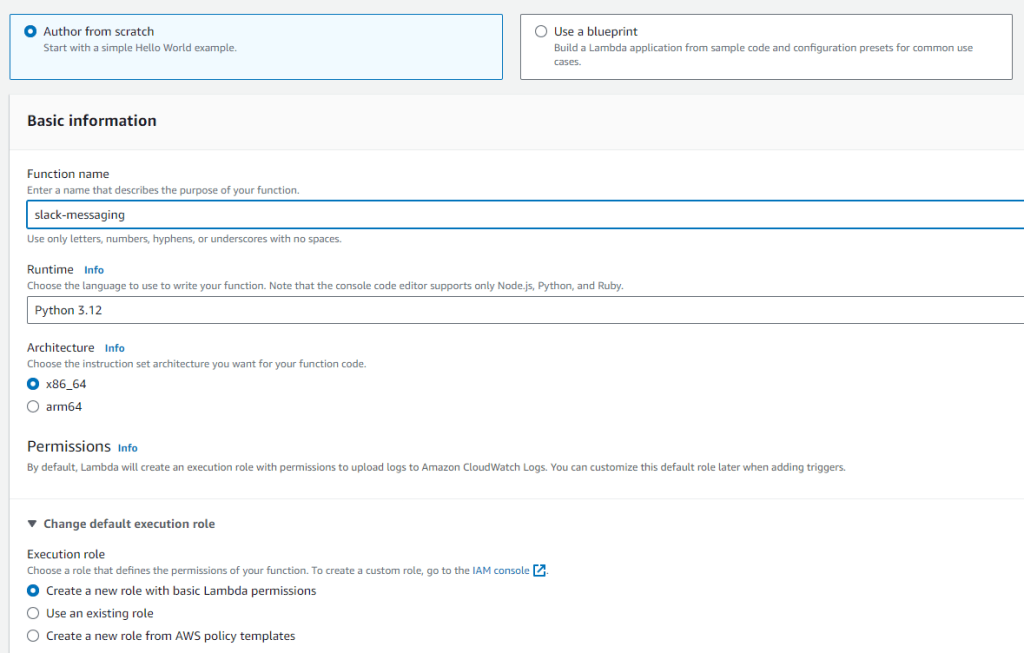
- Choose “Author from scratch” and provide a name for your Lambda function.
- Choose the latest Python runtime (e.g., Python 3.8 or higher).
- Under “Permissions,” create a new role with the necessary permissions to execute the Lambda function.
- Click “Create function” to create the Lambda.
- Deploy Code to Lambda:
- You need to package the code and dependencies for Lambda. You can do this using the following commands:
pip install requests -t /path/to/your/code-directory
pip install slack_sdk -t /path/to/your/code-directory- After installing the packages, add your code to the directory where you installed the packages.
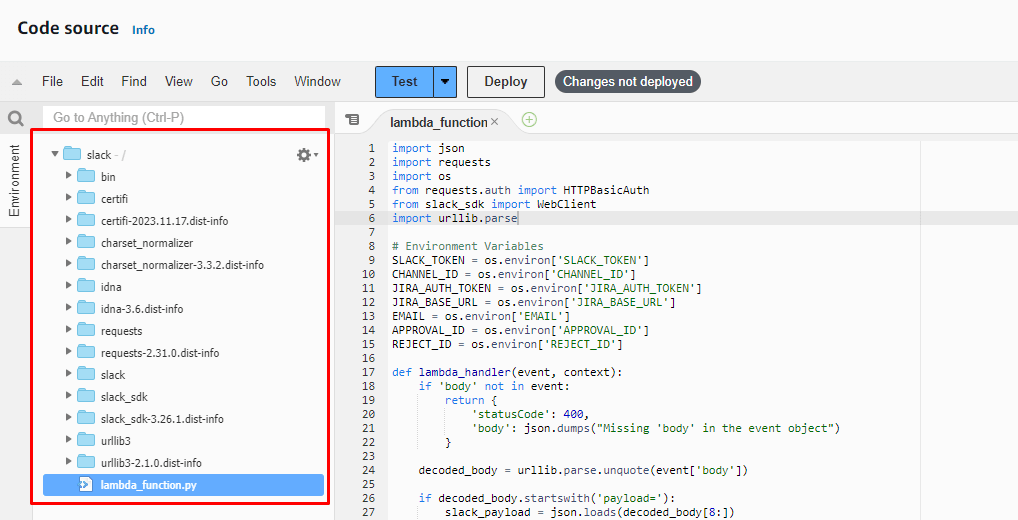
- You can find the source code here: https://bitbucket.org/rodolfobortolin/workspace/snippets/aqxbx5
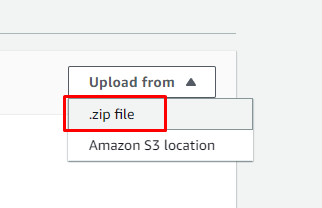
- Zip everything (code + packages) and upload to AWS.
It will look like this:
Environment Variables:
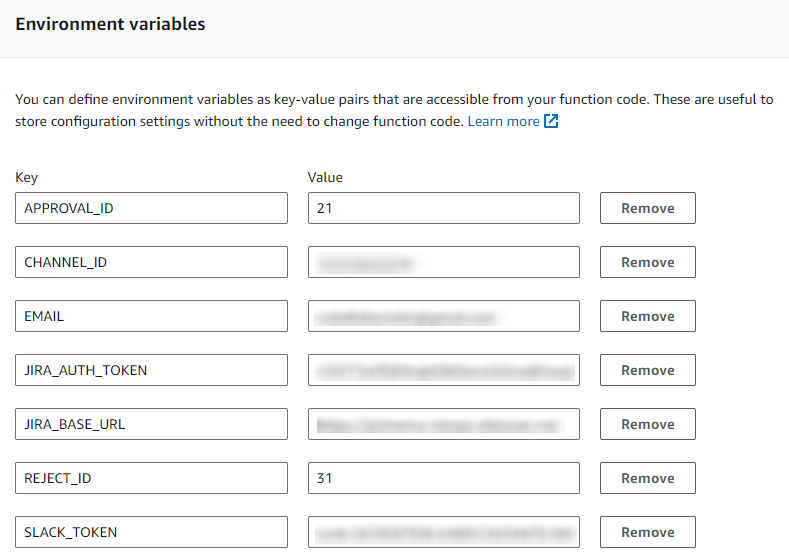
- In your Lambda function’s configuration, add environment variables for:
SLACK_TOKEN: Your Slack app token (Bot User Oauth Token)CHANNEL_ID: The ID of the Slack channel where you want to send messages.JIRA_AUTH_TOKEN: Your Jira authentication token.JIRA_BASE_URL: The base URL of your Jira instance.EMAIL: Your email address.APPROVAL_ID: The ID for the “approve” action in your Jira workflow.REJECT_ID: The ID for the “reject” action in your Jira workflow.
You can find the Slack channel ID by right-clicking on the channel, as shown in the image below.

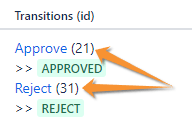
And as you probably already know, you can find the ID of Jira transitions in the workflow, in edit mode:
Configure API Gateway:
- To trigger your Lambda function via HTTP, you can create an API Gateway.
- In the AWS Lambda configuration, under “Designer,” click “Add trigger” and select “API Gateway.”
- Configure the API Gateway settings, such as security and authentication.

After clicking on the API Gateway, you will have the Endpoint link of the Lambda function that you should use to perform the interaction from Slack to AWS and also from Automation for Jira to AWS (the link is exactly the same).
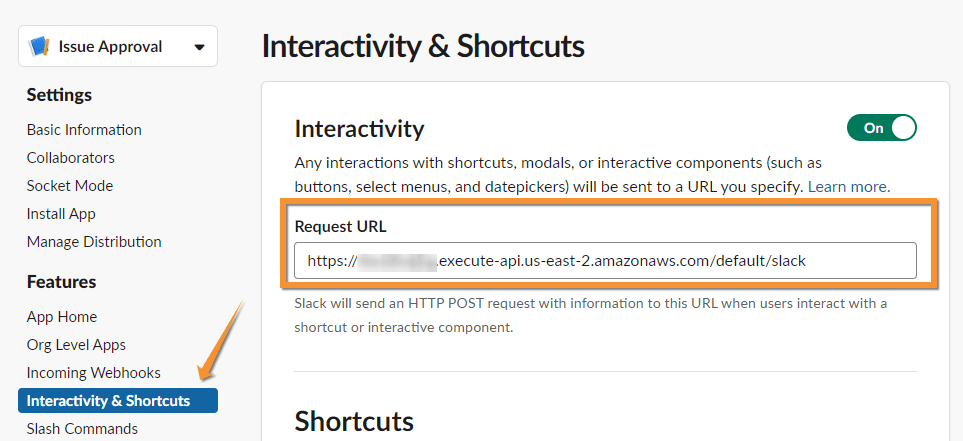
- Go back the plugin administration (in Slack) and click on Interactivity and Shortcuts.
- Paste the API endpoint URL into the Request URL field.
With your AWS Lambda function in place, you’ve created the backbone of your automation workflow, ready to process incoming requests and interact with Slack and Jira.
Create the Automation Rule in Jira
To automate the process of sending payload data to your AWS Lambda function, follow these steps to create a Jira automation rule:
- In Jira, go to “Settings” > “Automation Rules.”
- Create a new rule.
- Define a trigger that works best for you (usually transition to “Waiting Approval”).
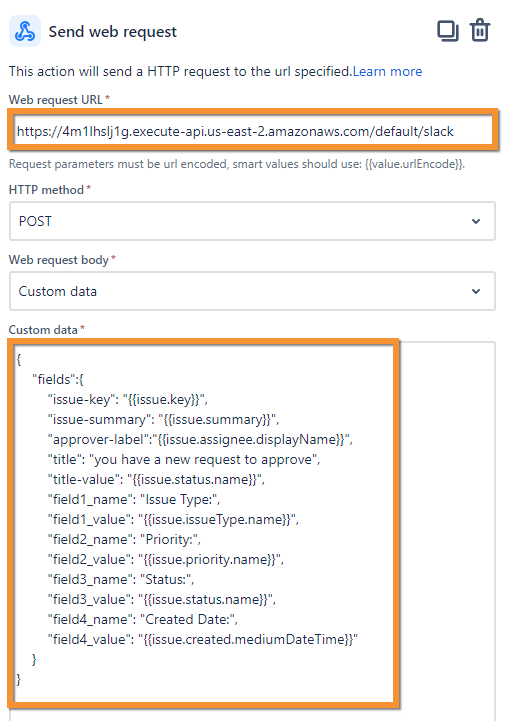
- Add a “Send Web Request” action.
- Set the HTTP method to POST.
- Set the URL to the API Gateway endpoint URL
- In the request body, paste this structure (you can modify the JSON as needed).
{
    "fields":{
        "issue-key": "{{issue.key}}",
        "issue-summary": "{{issue.summary}}",
        "approver-label":"{{issue.assignee.displayName}}",
        "title": "you have a new request to approve",
        "title-value": "{{issue.status.name}}",
        "field1_name": "Issue Type:",
        "field1_value": "{{issue.issueType.name}}",
        "field2_name": "Priority:",
        "field2_value": "{{issue.priority.name}}",
        "field3_name": "Status:",
        "field3_value": "{{issue.status.name}}",
        "field4_name": "Created Date:",
        "field4_value": "{{issue.created.mediumDateTime}}"
    }
}
Note that the field names such as Issue Type, Priority, Status, and Created Date can also be modified and are being mapped in the code to be sent in the Slack message.
By configuring this Jira automation rule and including the payload, you’ve established a mechanism to send data to your AWS Lambda function, enabling communication between Jira and Slack.
Exploring the Code
Now that you have set up your Slack app, AWS Lambda function, and Jira automation rule, let’s take a deep dive into the Python code that powers the automation workflow. The code includes key functions responsible for formatting payloads, sending Slack messages, and interacting with Jira. Here’s an overview of the code’s functionality:
lambda_handler(event, context): This is the entry point for the AWS Lambda function. It handles incoming events and decides whether to process Slack interactions or Automation data.format_slack_message(jira_data): This function formats the Slack message using data extracted from the Automation payload.send_slack_message(blocks): Responsible for sending a formatted Slack message to the designated Slack channel using theslack_sdklibrary.update_slack_message(response_url, issue_key, action_type): This function handles updates to Slack messages based on actions (e.g., approval or denial) and sends these updates back to Slack.add_comment_to_jira_issue(issue_id, comment_text): Handles adding comments to Jira issues to track actions taken in Slack.
Again, the source code can find here: https://bitbucket.org/rodolfobortolin/workspace/snippets/aqxbx5
Let´s Test!
When your trigger runs, a message like this will show in the channel you chose:

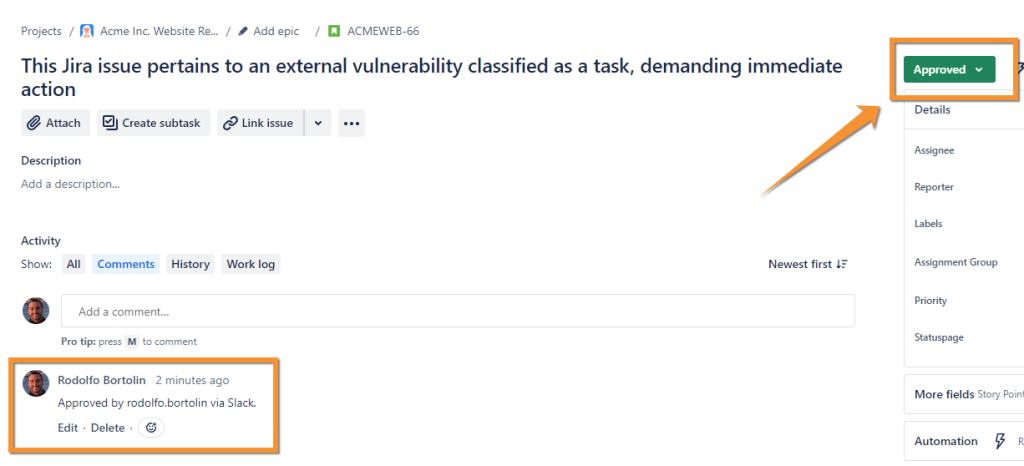
You can click Approve, and behind the scenes, Slack will send a webhook to the Lambda function, and perform the transition to the Jira issue. If successful, it will also create a comment with the user who clicked the button in Slack and modify the message in Slack saying that the issue was approved or reject.

You should use a System User for this purpose, instead of using my user account like I am currently doing for testing. I have set my email and token in the environment variables to do the transition and create the comment.
That’s it! You’ve created a Slack app, an AWS Lambda function, and integrated Jira with Slack using a Jira automation rule and API Gateway. Make sure to test thoroughly and adjust configurations as needed for your specific use case.
Keep in mind that this is a prototype, and many improvements can be made to the code and the solution itself. I came up with this solution because a close friend has this pain point, and I decided to try to solve it in the shortest time possible, within the free time I had.
I hope you have enjoyed it and have several other ideas of what can be done using these technologies.
Thank you!
